Saturday, May 22, 2010

Drop Cloth Window Coverings

Hi!

I love to change out my draperies for the seasons. Oftentimes, I just move them from one room to another just to get a fresh look. I decided I wanted something light and airy for spring and summer. But, I didn't want to buy anything new and I didn't have anything in my stash that would work. Then I remembered that I had seen canvas drop cloths used on some other blogs. My husband had three drop cloths still in their packages in our basement. It was fate!

Here they are (sorry for the poor picture quality - it is quite cloudy here today):


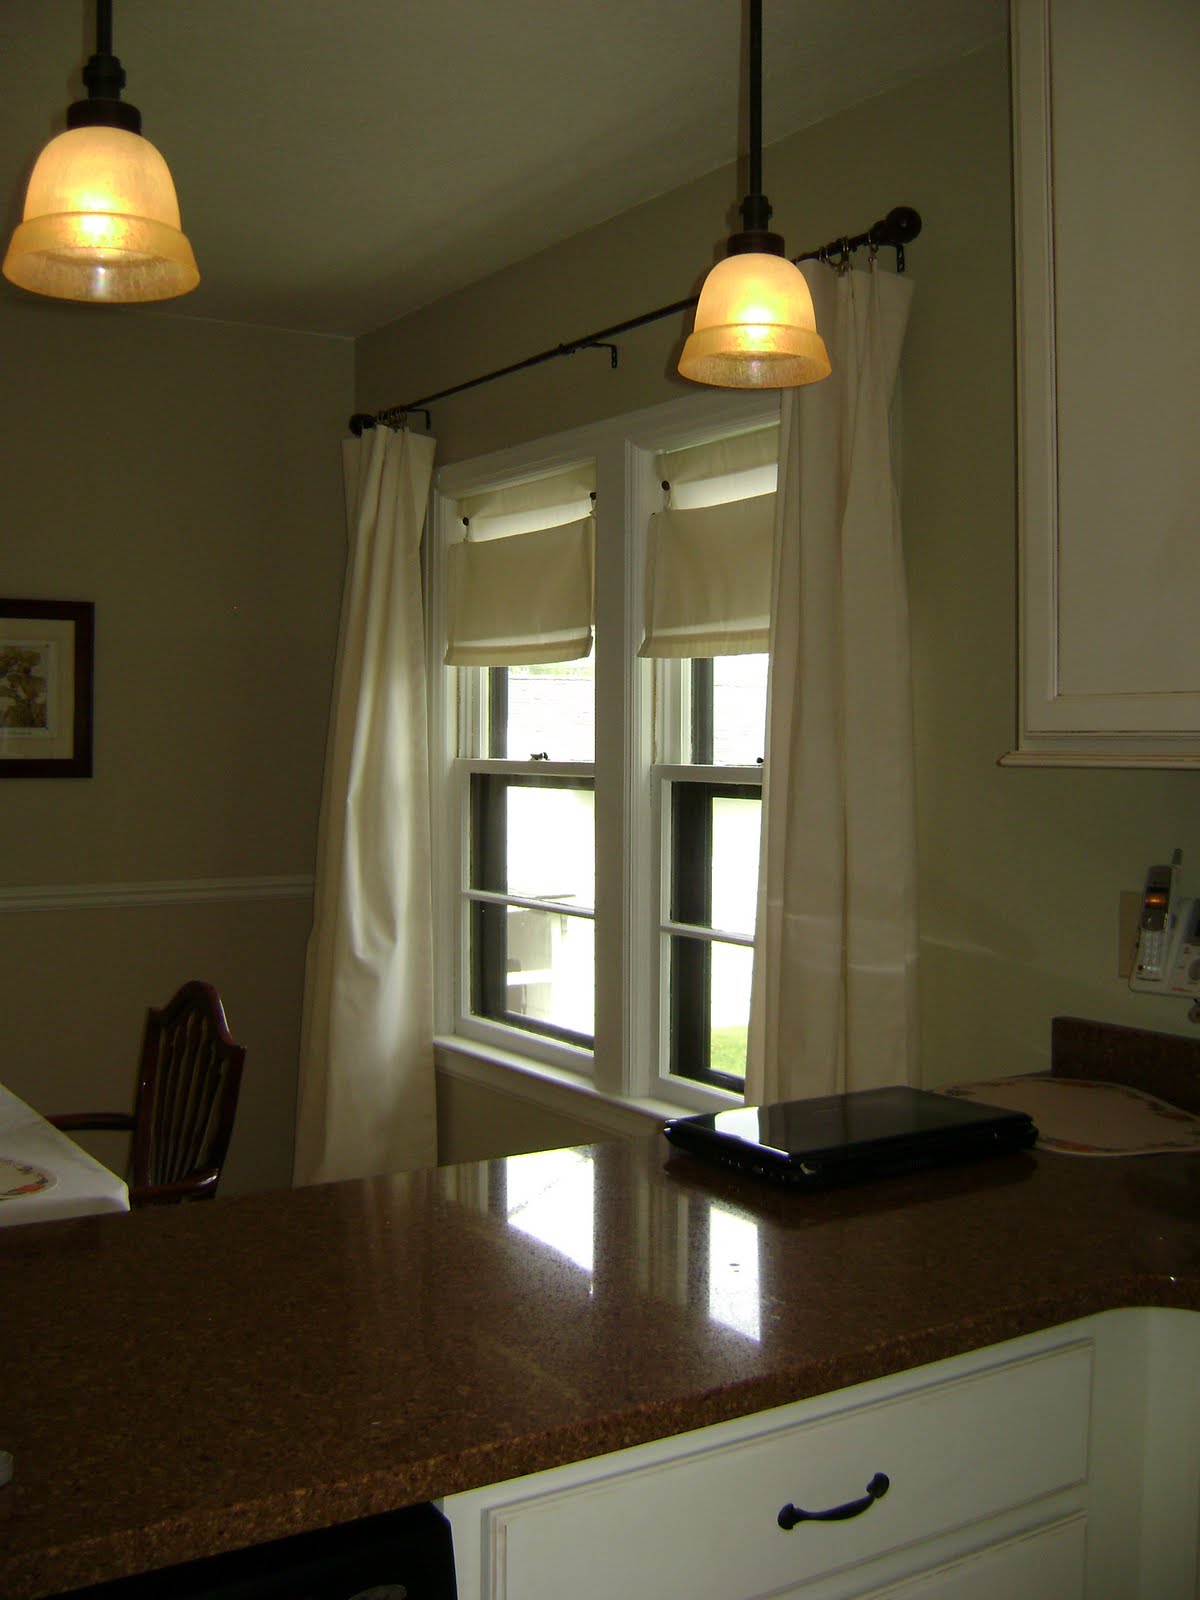
They are paired with canvas faux roman blinds that I made several years ago. The blinds can be lifted up and buttoned at different levels. I saw some of these on the Martha Stewart blog. Martha's had button holes, though, and I don't do button holes. So, I just made loops instead.

This is how they look when they're down:

Then I just put the bottom loop through the top loop and put the top loop over the button


They were very inexpensive and easy to make. Being as my home was built in 1939, the window sizes are not the dimensions of today's standards and most blinds would have to be custom ordered. So, this worked out great. They're neutral enough that they go with whatever draperies I decide to use.

Here's another photo I thought was silly, Bubba needed a chair at the window so he could watch my husband mowing the lawn :)

Linking up to:

Join  us Saturdays at tatertotsandjello.com for the weekend wrap up party!

Funky Junk's Saturday Nite Special


giveaways

UndertheTableandDreaming

Thanks for stopping by!

Thursday, May 20, 2010

Look What I Won!

Hi!

I came home from work for lunch today and when I opened my mailbox, there it was! The gift I won from Trish at Notes of Sincerity. Look how cute it was wrapped -


Then inside was this great bracelet and matching earrings!


The bracelet looks just like something I would pick out myself! The earrings were so cute, but I don't have pierced ears (I know, I know, it's wierd, but that's just me) soooo, I called my (twin) sister and told her she won some earrings! It worked out great!

I put the bracelet right on and wore it the rest of the day at work.

Thank you so much Trish!

Thanks for stopping by!

Tuesday, May 11, 2010

Dresser Makeover

Hi!

Well, I'm stilllllll working on the master bedroom makeover. But, I just had to show the transformation of this dresser. My husband and I got married a little over a year ago and he brought his bedroom furniture. Knotty pine. All my delicate white painted furniture was ousted. I've been living in a a bachelor's bedroom. But, he relented and let me paint out the knotty pine so we have a good compromise.

Here's the before and after:


Now that it's painted you notice the nice details so much more. Oh, and the dresser originally had wooden knobs that were almost two inches across but I didn't get a picture of that...but you can imagine it just added to the "not-my-styleness" of the piece. And, yes, that is paint on the floor - just keepin' it real.

I'm going to link this to Thrifty Decor Chic's Before and After Party.

I also posted this at:
Furniture Feature Fridays

Thanks for stopping by!

Thursday, May 6, 2010

White Elephant Dresser

Hi!

Every spring in my hometown there is a "White Elephant" sale hosted by a local church. It's held in the arena and I always find awesome deals there. At last year's sale, I got the little dresser with shelves below. It had really been loved by some little girl because there were stickers all over it and the drawers even had some Barbie shoes and barrettes in them.


I got her for $5. We took her home and replaced one side of the dresser portion as it was cracked. Then it was just time for some sanding and paint. I gave her some new hardware and she looks great in my craft area.


I'm linking this up to:

Furniture Feature Fridays

Thanks for stopping by!

Tiny Transformation

Hi!

I got this jewelry box from my sister-in-law when I was about 10. It was the first "grown-up" gift I remember getting. I've had it hanging around for over 30 years now (go ahead, do the math, I'm almost 43!).


I never did understand why it had an image of slaves picking cotton on it. Maybe this is a famous painting or something but nevertheless it needed a change. It was one of those fast and easy projects. Just take out the mirror and the fabric, paint it black, put in some new fabric and you're done.


Wasn't that easy? And isn't it funny how the smallest project can give you a feeling of accomplishment?

Thanks for stopping by!

Wednesday, April 28, 2010

Drop Cloth Slipcover

Hi!

Just as I made the drop cloth draperies for the dining area to help lighten up the mood for spring and summer, I decided I needed to make a change in my living room.

This is how it looked before. Please take note of silliness: Our dog has a little "recliner" right next to my husbands :)


The colors were too dark for this time of year. So, I changed out the draperies (for some that had been in the master bedroom...). That helped a lot. But, what about the cranberry red loveseat? Well, I got out the second drop cloth and made a very simple slipcover. This was my first try at a project like this so give me a break.


I linked up to:


Thanks for stopping by!

Honey, I Dyed the Draperies!

Hi!

I'm decorating our master bedroom. I've been trying to keep the cost ultra low and use as many items as I already have. I wanted to change out the white quilted drapes but couldn't find anything I liked in the price range I had set. So, I decided why not just dye the existing drapes? Since they were white they had some areas that had yellowed and I've had them for ages. So, I felt I could justify a dye job. Not as easy as it sounds. Did you know that draperies are very heavy when wet? And that they are extremely difficult to wring out? I hadn't thought of these important issues. Good thing my husband is the type who, when seeing me working on any type of project is always on the lookout for some type error I may be in the process of making and hands out loads of free advice on the better method of accomplishing the goal at hand. Usually I am frustrated by this behavior but this time it was a blessing! He took over the project and they came out pretty well. They went from boring white to this:


This took quite a bit of time as even with an 18 gallon wash tub we felt that we could only do one panel at a time in order for the panel to move freely in the water so that the dye would come out evenly. And when you dye them separately it makes it MUCH harder to have a uniform outcome. And it did take two hours of his time to complete. It's just a good thing I started this project after the Twins game was over.

Now for the cost breakdown: dye $12; canvas I already had (from a drop cloth) $0; new trim $11. So, the total makeover on these drapes came to about $23. I think that's pretty thrifty. And they could now be considered "custom draperies" :) You'll see the whole panel when I reveal the bedroom makeover .... someday.

I linked this to:

sweetcharli"

Thanks for stopping by!

Sunday, April 25, 2010

Rock the Night

Hi!

I just had to share some photos of the awesome props my sister made for prom. The theme was Rock the Night. She made these cool (to scale) giant guitars for the auditorium stage where they hold the Grand March and five more for the gym where the dance is held.


Aren't they great? Everyone loved them! Guess she's in charge of prom props for next year!

Thanks for stopping by!

Sunday, April 18, 2010

Pillows, Pillows and Posts with No Photos

Hi!

I'm slowly finishing projects for our master bedroom makeover. My husband picked out a creamy colored bedspread so I decided to use black and cream as the colors in this room. I altered some large shams I got for $3 each. I didn't have a pillow that fit such a large sham, so I just measured a square pillow I had and sewed a square into the center of the sham. This created a "trim" piece on each sham. This only took 10 minutes. They do have a "sting-ray" quality to them but I'm thinking the more they're used and washed this will go away :)


Then, I put together two pillows using some canvas (of course) and some black denim I've had for ages. Then I put a square of decorator fabric in the center of each pillow. I'll probably add some trim to the pillows also.


I'm pretty pleased with how they came out. And they were very easy to make.

And if you noticed that there were a couple posts that had no pictures, I'll get those fixed. You can tell I'm a newbie blogger!

I linked this project up to:

UndertheTableandDreaming


Thanks for stopping by!

Saturday, April 17, 2010

Happy Valentines Day!?!?

I know, I know, it's April! But I just finished my Valentine project and I wanted to show it to you.

I just used a 10 x 10 canvas, some buttons from my mom's and grandma's button boxes and made this cute Valentine decoration.


First, I sewed the first layer of flat buttons on, leaving some spaces between them. Then, I hot glued buttons with shanks into the spaces.


Something funky happened to the bow :) I didn't notice that before I took the picture, but you get the gist anyway.

I'm linking this post to:

UndertheTableandDreaming

and
Join us Saturdays at tatertotsandjello.com for the weekend wrap up party!


Funky Junk's Saturday Nite Special


Thanks for stopping by!